Update Custom Procore Analytics Reports Using Legacy Custom Fields
 Important
This tutorial is written for users who are familiar with updating custom reports in Microsoft's Power BI Desktop. For the most up-to-date-information available, visit Microsoft's Power BI web site.
This tutorial is written for users who are familiar with updating custom reports in Microsoft's Power BI Desktop. For the most up-to-date-information available, visit Microsoft's Power BI web site.
Objective
To update a custom report to include Procore's legacy custom fields in Power BI Desktop.
Steps
Open Power BI Desktop.
Open a report that has been customized to use legacy custom fields from one of the following Procore fieldsets:
Project
Prime Contracts
Purchase Orders
Subcontracts
 Note
NoteThe screenshots throughout this tutorial use Procore's 'Project' fieldset as an example.
The screenshots throughout this tutorial use Procore's 'Project' fieldset as an example.
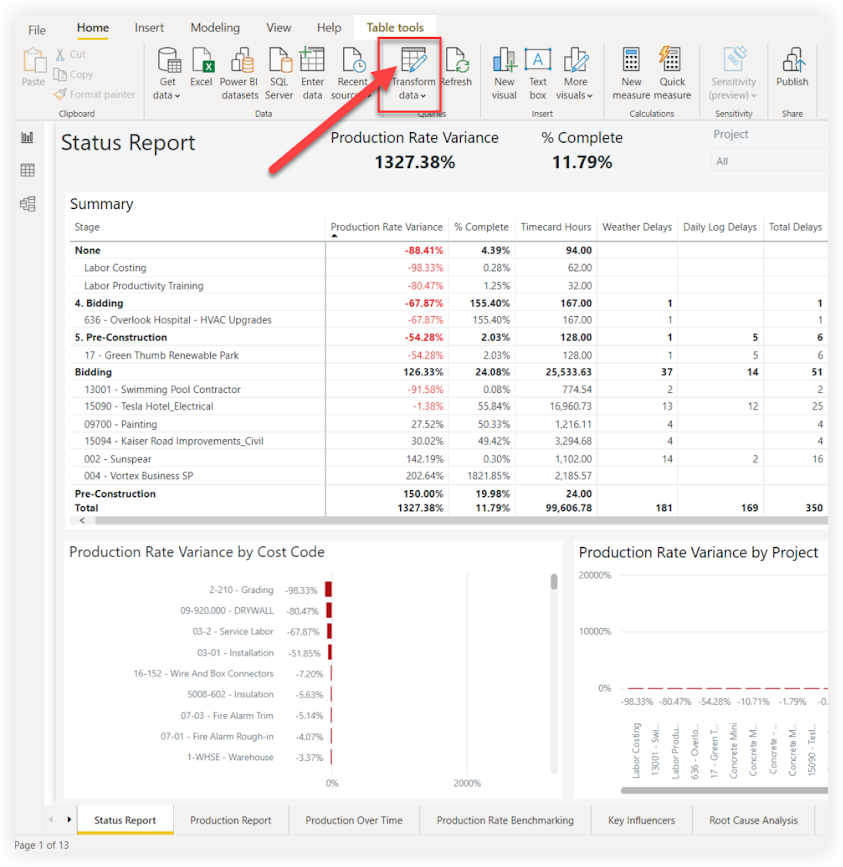
Click Transform Data to open the Power Query Editor.
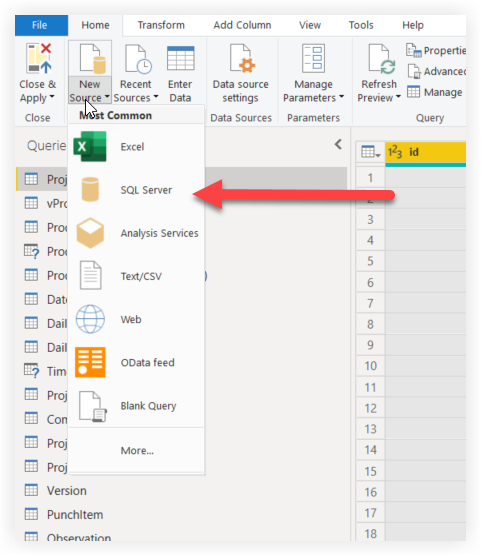
Click New Source and select SQL Server from the drop-down menu.
In the SQL Server database window:
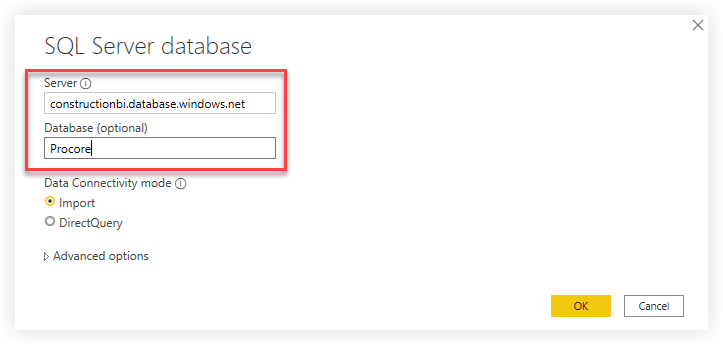
Enter constructionbi.database.windows.net in the Server field.
Enter Procore in the Database field.
Click the Import button under the Data Connectivity mode options.
Click OK.
In the Navigator window:
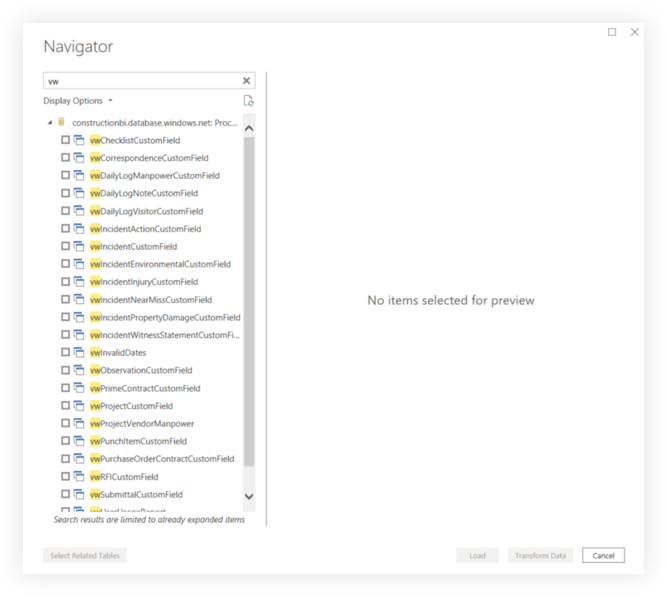
Enter the SQL view name in the search bar to locate the custom field table.
Below are the SQL view names for the fieldsets applicable to this tutorial:* Project: vwProjectCustomField* Prime Contracts: vwPrimeContractCustomField* Purchase Orders: vwPurchaseOrderContractCustomField* Subcontracts: vwWorkOrderContractCustomFieldMark the checkbox next to the search result.
Click OK.
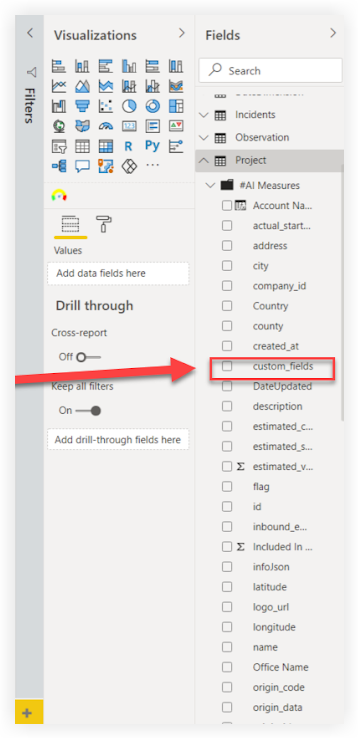
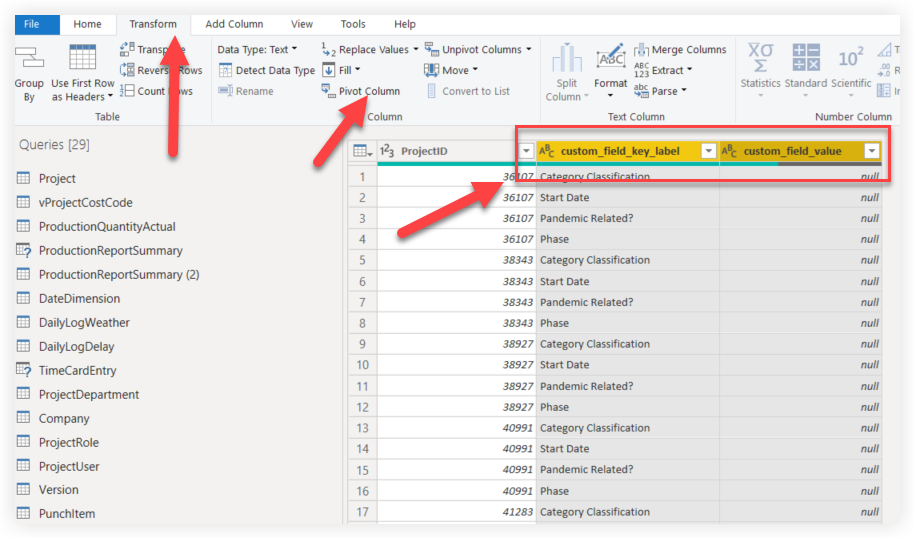
Select the fieldset's ID column, the custom_field_key_label column, and the custom_field_value column.
Below are the column names for the fieldset identifiers applicable to this tutorial:Project: ID
Prime Contracts: PrimeContract_ID
Purchase Orders: PurchaseOrderContract_ID
Subcontracts: WorkOrderContract_ID
To select all columns:* Left click one column name.* Hold the CTRL key and left click the other column names
Right click on one of the three selected columns and select Remove Other Columns from the drop-down menu.

Select the custom_field_key_label and custom_field_value columns.
To select the two columns:Left click one column name.
Hold the CTRL key and left click the other column name.
Click the Transform tab.
Click Pivot Column.
In the Pivot Column window:
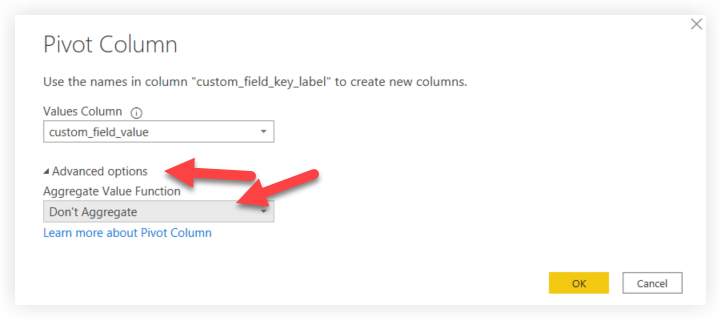
Click Advanced options.
Select Don't Aggregate from the Aggregate Value Function drop-down menu.
Click OK.
Click the Home tab.
If the update was successful, you will see your company's custom fields as individual columns in the query corresponding to their fieldset.
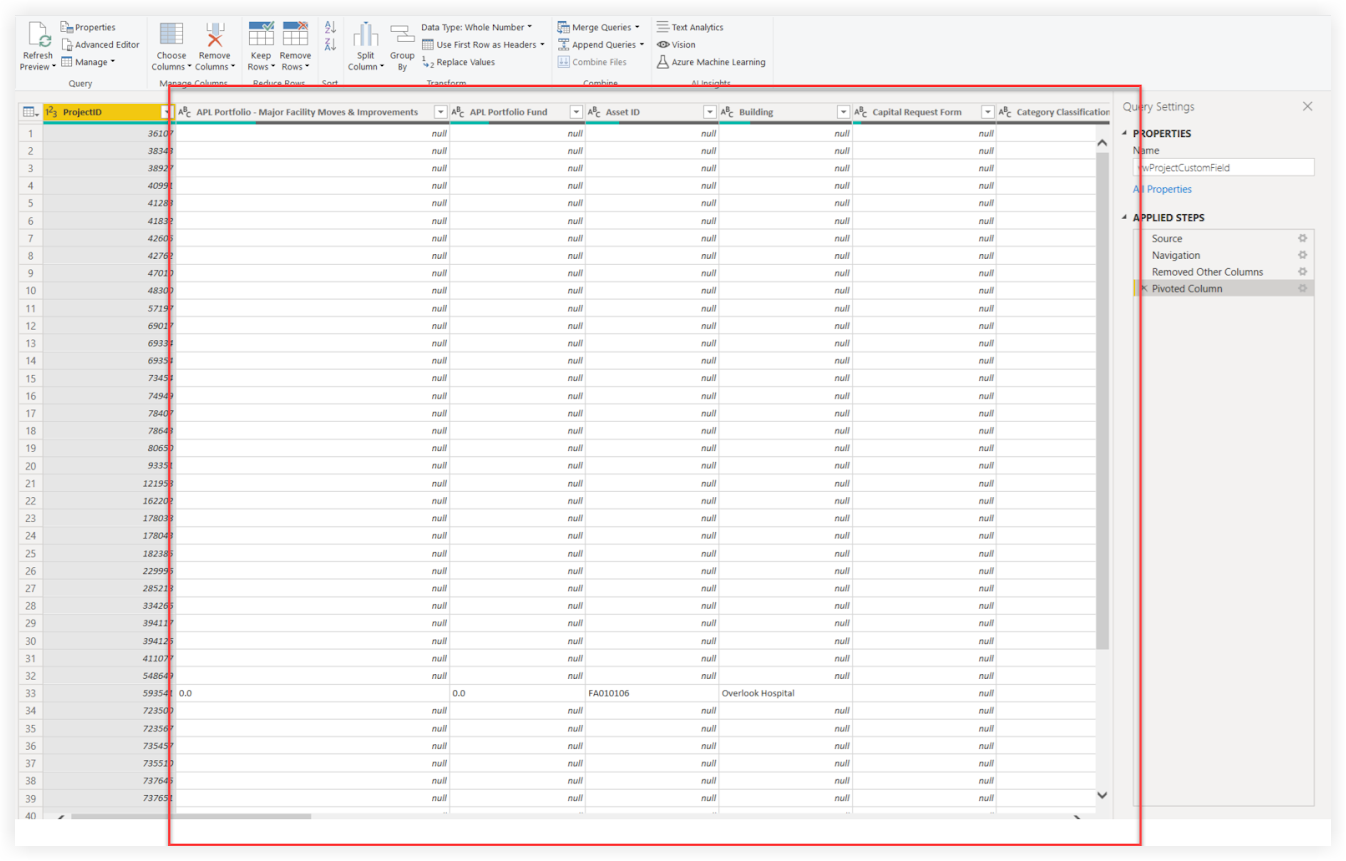
Click Close & Apply.

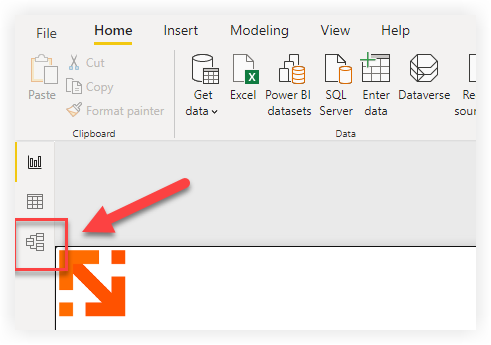
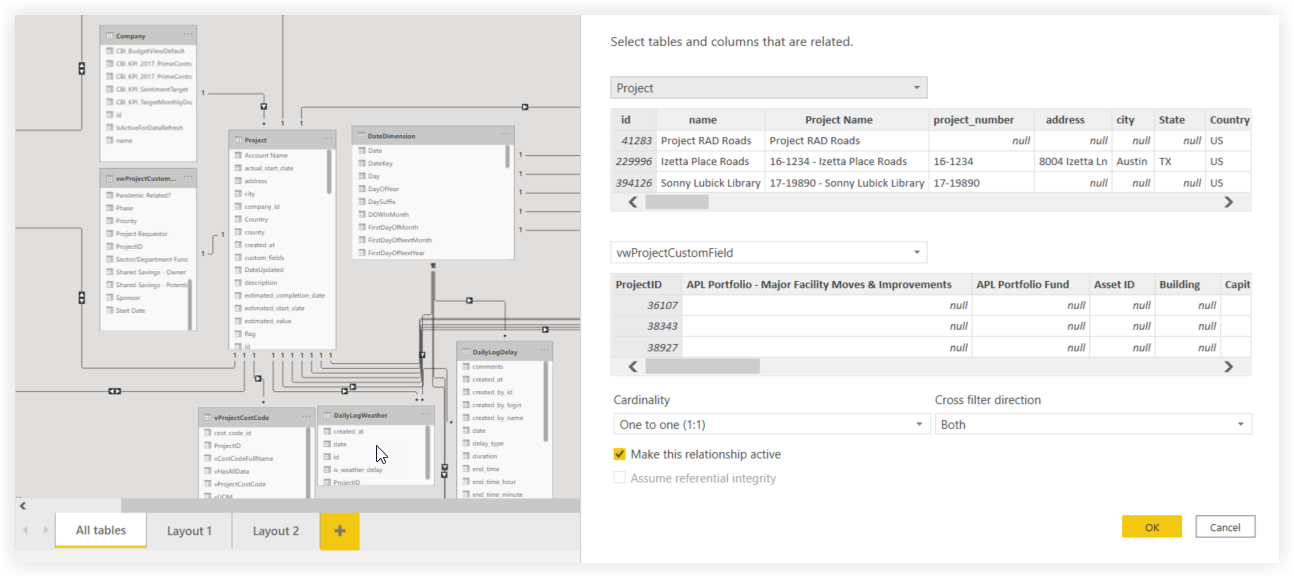
On your report, click the Model view.
Establish a relationship with the appropriate table and columns for the fieldset.
Project: Connect Project.ID to vwProjectCustomField.ProjectID
Prime Contracts: Connect PrimeContract.IDtovwPrimeContractCustomField.PrimeContract_ID
Purchase Orders: Connect PurchaseOrderContract.ID to vwPurchaseOrderContractCustomField.PurchaseOrderContract_ID
Subcontracts: Connect WorkOrderContract.ID to vwWorkOrderContractCustomField.WorkOrderContract_ID
Reconfigure your report's visuals by sourcing the applicable custom field data from the new table you've created.
Save and publish your report.