Set Up the hh2 Synchronization Client for Exporting PCCOs
Objective
To configure your hh2 Synchronization Client for exporting Prime Contract Change Orders (PCCOs).
Background
To learn how to export a Prime Contract Change Order, see Export a PCCO to ERP.
Things to Consider
Required User Permissions:
The company's Procore Administrator should supply the steps below to the company's IT administrator for the hh2 tool.
The person performing the steps will need to log into the Sage 300 CRE® server using an account with administrative privileges.
Supported ERP Integrations:
Your company's Procore account must already be integrated with Sage 300 CRE®.
Limitations:
The sync process for the Prime Contract Change Orders is NOT bidirectional. You will not have the ability to import change orders or updates made in Sage 300 CRE® to Procore.
Steps
Log into your Sage 300 CRE® server using an account with administrative privileges.
Launch your company's hh2 Synchronization Client.

Click Connect.
Browse to the Local Connections tab.
Click Mappings.
Click Advanced Mappings.
Place a checkmark next to the following items:
Important! Do NOT remove any previously selected checkmarks. Doing so could negatively impact your existing Sage 300 CRE® configuration settings.
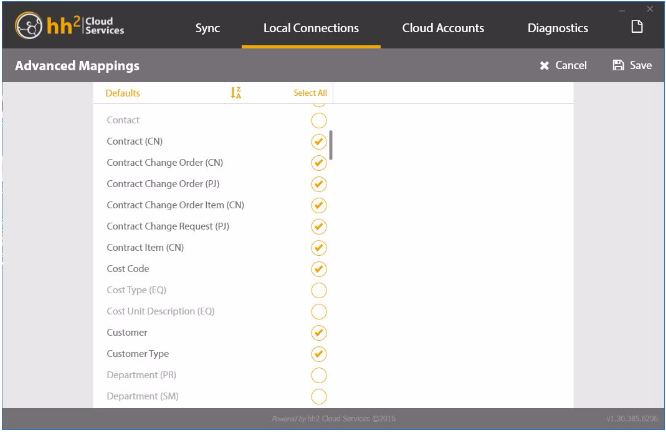
Contract (CN)
Contract Change Order (CN)
Contract Change Order Item (CN)
Contract Item (CN).
Customer
Customer Type
Invoice (AP)
Job (CV) Note: This may already be selected.
Quick Bill Contract
Quick Bill Contract Item
If you own the Project Management (PJ) Module in Sage 300 CRE®, you will also place a checkmark next to the following items (if not, go the next step):
Contract Change Order (PJ)
Contract Change Request (PJ)
Click Transaction (JC) to highlight it.
Place a checkmark next to ALL the items in the panel on the right.

Remove the following checkmarks from the circles in the panel on the left:
Commitment Change Order
Credit Account
Debit Account
Employee
Equipment
Pay ID
Reference 1
Reference 2
Click Save.
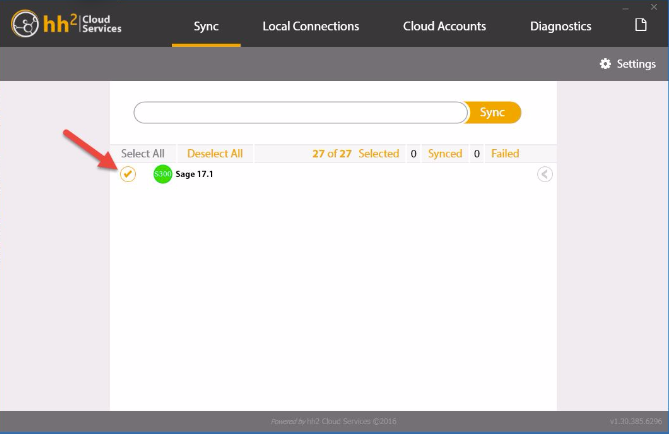
Navigate to the Sync tab.
Place a checkmark next to your connection as shown below.
Click Settings .
Select a Sync Type of Deep and the timeframe of “The beginning of time”.
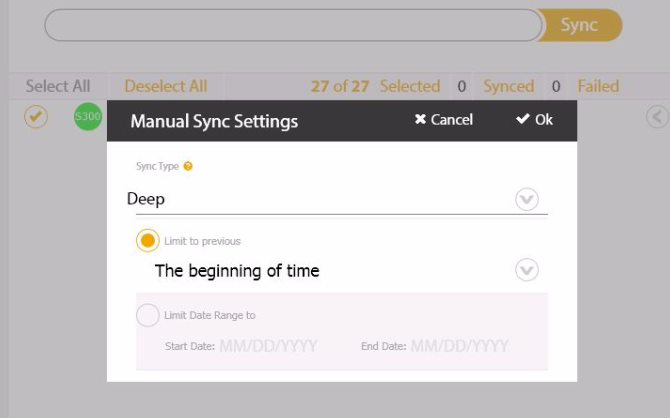
Click OK.
Click the arrow to expand the options under your connection as shown below.
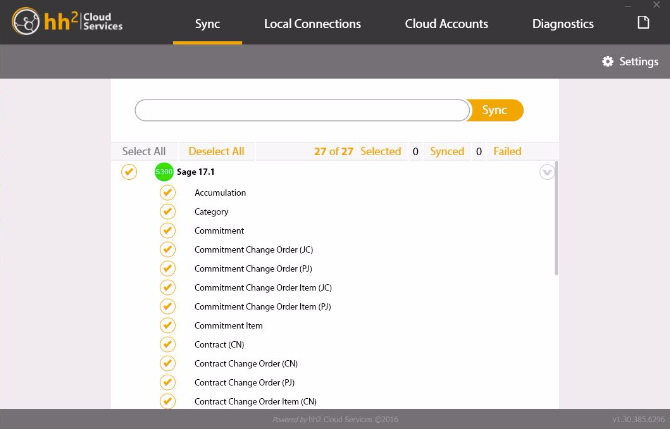
Click Deselect All.
This removes all the checkmarks from the selected items.Place a checkmark in the circle next to the following items:
Contract (CN)
Contract Change Order (CN)
Contract Change Order Item (CN)
Contract Item (CN).
Customer
Customer Type
Quick Bill Contract
Quick Bill Contract Item
If you own the Project Management (PJ) Module in Sage 300 CRE®, you will also place a checkmark next to the following items (if not, go to the next step):
Contract Change Order (PJ)
Contract Change Request (PJ)
Click Sync.
After the sync is complete, you can close the hh2 Synchronization Client and log off of the Sage 300 CRE® server.