Complete a Prime Contract with DocuSign®
Objective
To complete the electronic signature process for a prime contract using the Procore + DocuSign® integration.
Background
After a project team member creates a prime contract, Procore users with a DocuSign® account can prepare a DocuSign® envelope for the contract to send to the appropriate recipient(s) to request a signature.
If you are the recipient of a signature request, you do not need a DocuSign® account. However, if you do have a DocuSign® account and the email address matches the email you use in Procore, a copy of any documents you sign will be saved in your DocuSign® account. See Do I need a DocuSign© account?
Things to Consider
Required User Permissions:
'Admin' level permissions on the project's Prime Contracts tool.
Additional Information:
Once you sign into you DocuSign® account from Procore, you will NOT need to sign in again until the login token expires. Once expired, the 'Re-Authentication Required' banner appears in Procore. To learn more, see What do the different DocuSign® banners in Procore mean?
Prerequisites
Enable the DocuSign® Integration on Your Company's Procore Account
To request signatures with Procore + DocuSign®: You must have an active DocuSign® account. Recipients do NOT need an account to sign a document. See Do I need a DocuSign© account and How do I get a DocuSign® account?
Steps
Open the Prime Contract in Procore
Log in to DocuSign®
Prepare the DocuSign® Envelope
Open the Prime Contract in Procore
Navigate to the project's Prime Contract tool.
In the Contracts tab, locate the contract.
Click the Number link to open it.
In the contract's General Information card, click Edit.
Mark the **Sign with DocuSign® **check box.
Complete the data entry as required. See Create a Prime Contract and (Beta) Create Prime Contracts.
Click Save.
After the data entry is complete, choose an option:
If this is an existing contract, click Send with DocuSign at the top of the page.

If this is a new contract, click Create & Send with DocuSign at the bottom of the page.

This launches DocuSign®.
Log In to DocuSign®
If you are NOT logged into your DocuSign® account when you launch the DocuSign® application from Procore:
 Notes
NotesTo learn how to gain access to DocuSign® from a Procore tool, see one of the tasks in Which Procore project tools support the DocuSign® integration?
To log into DocuSign® from Procore, you need valid login credentials (an email address and a password) for a DocuSign® account. To learn more, see Do I need a DocuSign© account? and How do I get a DocuSign® account?
To learn how to gain access to DocuSign® from a Procore tool, see one of the tasks in Which Procore project tools support the DocuSign® integration?
To log into DocuSign® from Procore, you need valid login credentials (an email address and a password) for a DocuSign® account. To learn more, see Do I need a DocuSign© account? and How do I get a DocuSign® account?
At the DocuSign® Log In page, type your email address in the Email box:
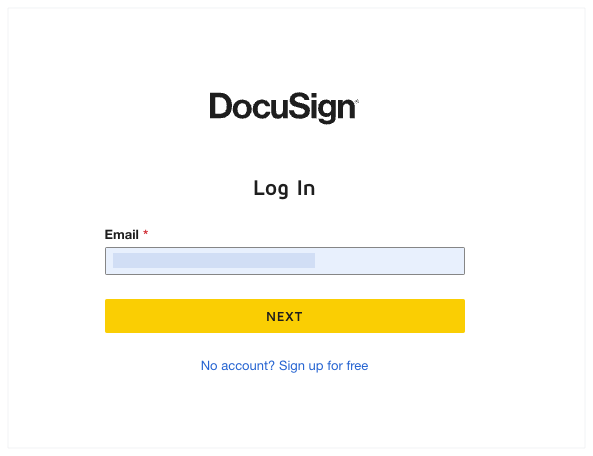
Click Next.
Enter your password.
Click Log In.
Prepare the DocuSign® Envelope
Once you are logged in, the 'Upload a Document and Add Envelope Recipient' page appears. Complete these steps:
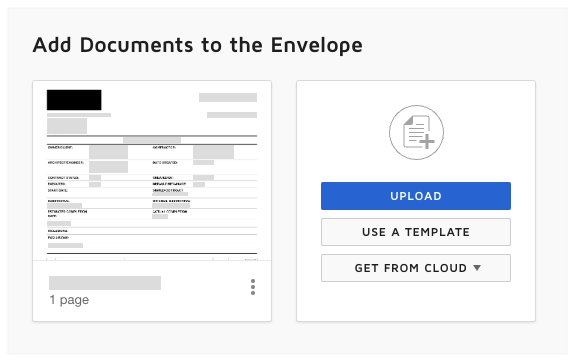
Add Documents to the Envelope
Add Recipients to the Envelope
Add a Message to All Recipients
Preview the Signature Fields & Send the Envelope
Add Documents to the Envelope
The following Procore information automatically populates the DocuSign® envelope:
A PDF copy of the contract is automatically added to the 'Add Documents to Envelope' section.
The required signature boxes for each 'Role' on the contract. For example, the Owner/Client, Contractor, and Architect/Engineer who are parties on the contract. This includes each users 'Name' and 'Email Address.' For more information, see Add Recipients to the Envelope below.
You have the option to add other documents as follows:
Optional: If you want to add additional documents to the envelope, choose one of the available options under the 'Add Documents to the Envelope' section:

Note
The available options in the 'Add Documents to the Envelope' section are developed and maintained by DocuSign®. To learn how to use DocuSign®, Procore recommends reviewing the content on support.docusign.com.
Upload
Use a Template
Get From Cloud
Add Recipients to the Envelope
To add recipients to the envelope:
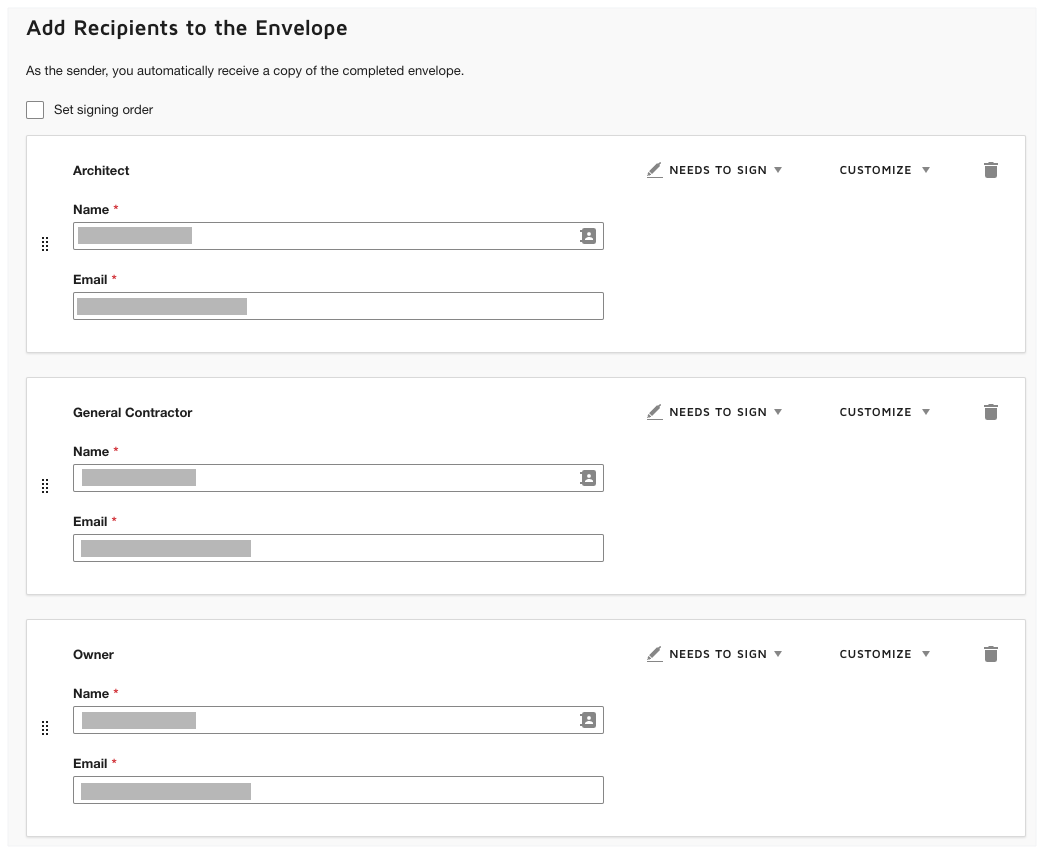
Under 'Add Recipients to the Envelope', keep the default recipient blocks, their names, and their email addresses. This data is added to the envelope automatically by the Procore+DocuSign® integration. If the data was specified in Procore, the values in the 'Name' and 'Email Address' fields of the recipient blocks correspond to these fields in Procore:
Architect. This is the individual designated in the 'Architect/Engineer' field of the contract.
General Contractor. This the individual who is designated in the 'Primary Contact' field in the Project Directory for the company designated in the 'Contractor'' field of the contract.
Owner. This is the individual designated as the 'Owner/Client' in the contract.
 Tips
TipsNot seeing one of the recipient blocks in DocuSign®? If your company has engaged the Procore Custom Solutions team to add custom fields to the Prime Contracts tool or if your company has implemented one of Procore's language or point-of-view dictionaries, the recipient blocks in your environment may be different. Check with your company's Procore Administrator to see if your tool has any custom fields. To learn more, see What languages are available in Procore? and What tool names and terms are different in Procore for general contractors, owners, and specialty contractors?
Not seeing a 'Name' or 'Email Address' in a recipient block? If data wasn't entered in one of the contract fields before you sent the item to DocuSign®, there was no data to transfer to DocuSign®. You will need to return to Procore, enter the data in the appropriate field, and resend the envelope to DocuSign®.
 Tip
TipWant to add, change, or remove recipients DocuSign®? The options in the 'Add Recipients to the Envelope' section are developed and maintained by DocuSign®. If you change the recipient information in DocuSign®, keep in mind that any changes made in DocuSign® do NOT update in Procore and can lead to unwanted results. To ensure the integration works as designed, Procore recommends keeping the recipient fields that were added by the integration. To learn how to use DocuSign®, Procore recommends reviewing the content on support.docusign.com.
Want to add, change, or remove recipients DocuSign®? The options in the 'Add Recipients to the Envelope' section are developed and maintained by DocuSign®. If you change the recipient information in DocuSign®, keep in mind that any changes made in DocuSign® do NOT update in Procore and can lead to unwanted results. To ensure the integration works as designed, Procore recommends keeping the recipient fields that were added by the integration. To learn how to use DocuSign®, Procore recommends reviewing the content on support.docusign.com.
Add a Message to All Recipients
In the 'Message to All Recipients' section, do the following:
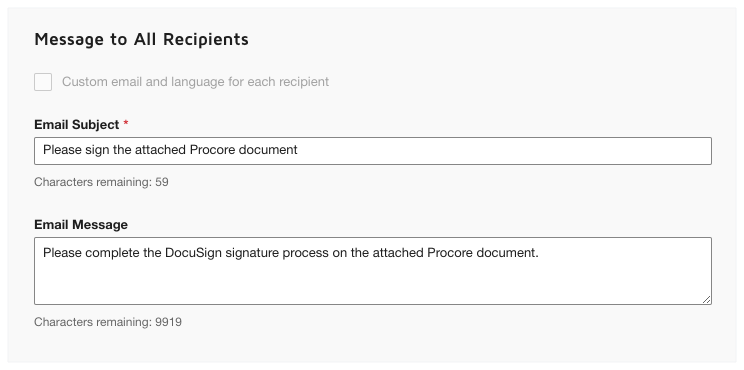
Email Subject
Type a subject line for the outgoing email message.Email Message
Type the content of your outgoing email message.
Click Next.
Preview the Signature Fields & Send the Envelope
Next, preview the PDF's signature fields. Each signature field corresponds to the authorized signature holder as designated in Procore's Prime Contract's tool. These fields also correspond to the recipients on the DocuSign® envelope.:
Architect. This is the individual designated as the 'Architect/Engineer' in Procore's contract.
General Contractor. This the individual who is designated as the 'Primary Contact' in the Project Directory for the company designated as the 'Contractor'' in Procore's contract.
Owner. This is the individual designated as the 'Owner/Client' in Procore's contract.
 Tip
TipNot seeing the signature fields above? If your company has engaged the Procore Custom Solutions team to add custom fields for use with the Prime Contracts tool or if your company has implemented one of Procore's language or point-of-view dictionaries, the recipients that appear in your environment may be different. To learn more, see What languages are available in Procore? and What tool names and terms are different in Procore for general contractors, owners, and specialty contractors?
Not seeing the signature fields above? If your company has engaged the Procore Custom Solutions team to add custom fields for use with the Prime Contracts tool or if your company has implemented one of Procore's language or point-of-view dictionaries, the recipients that appear in your environment may be different. To learn more, see What languages are available in Procore? and What tool names and terms are different in Procore for general contractors, owners, and specialty contractors?
Scroll to the bottom of the PDF to view the signature fields. An example is pictured below.
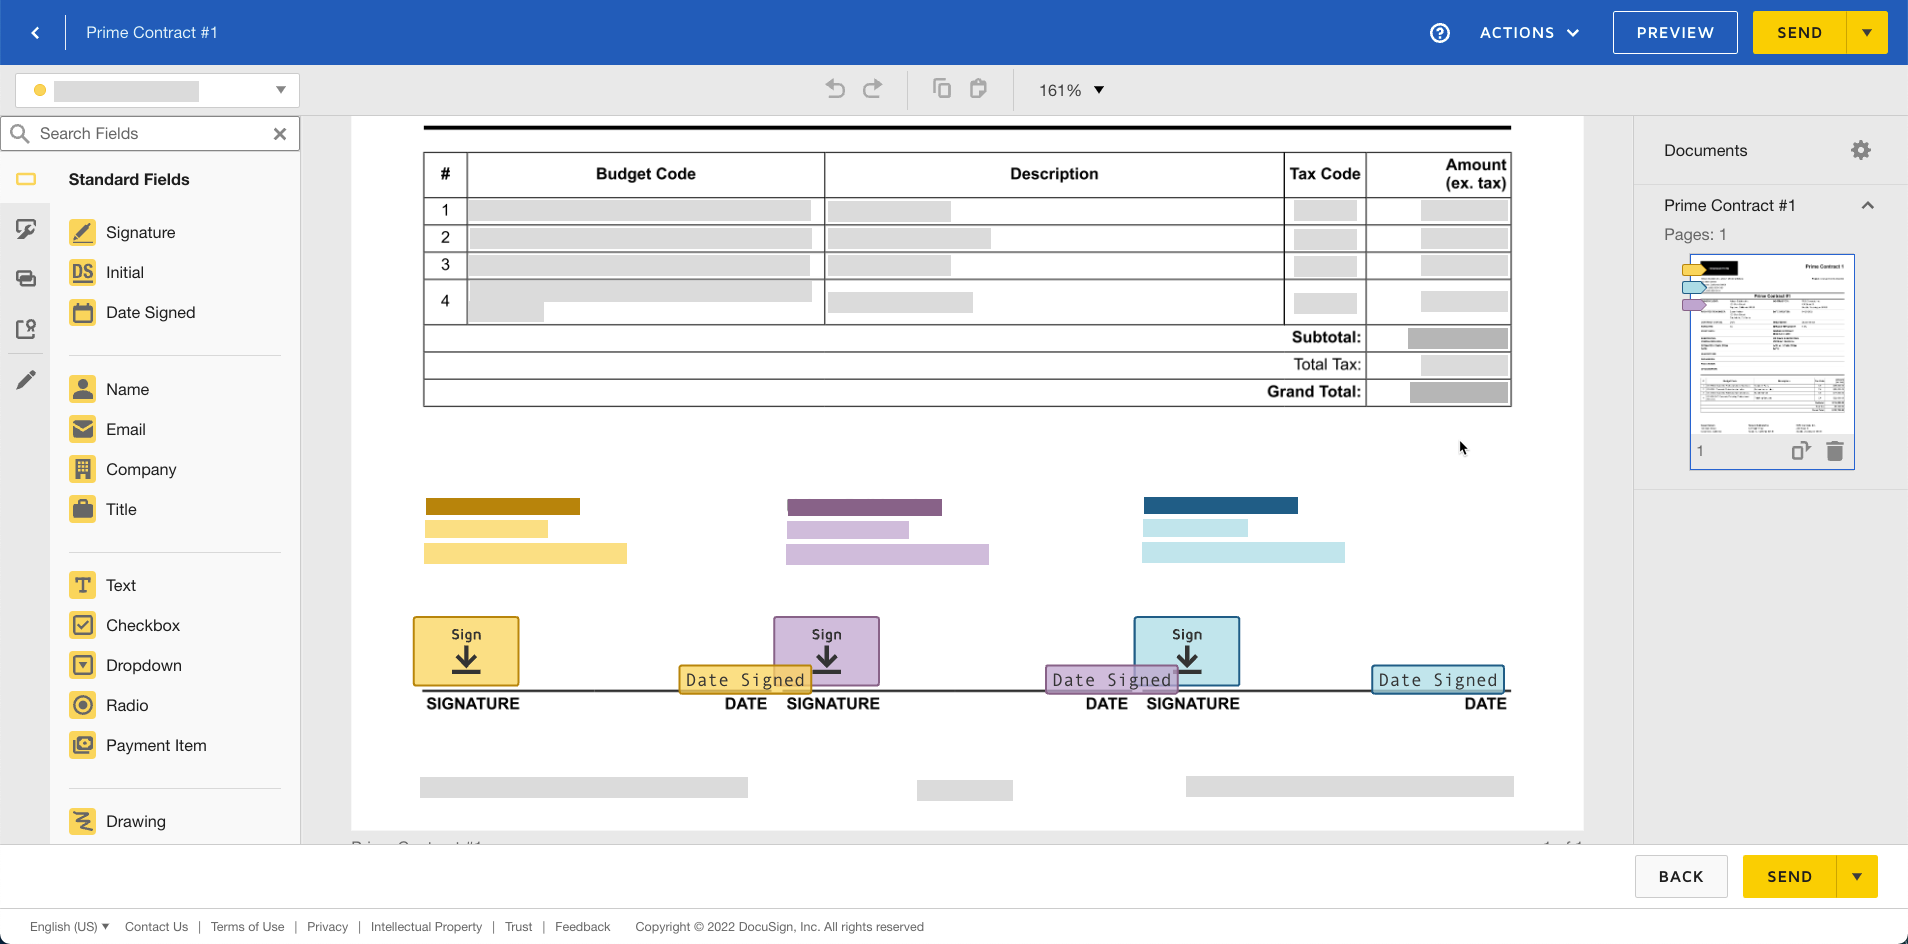
Keep the existing signature fields. These fields are automatically populated by Procore and keeping them in their default positions ensures the signature workflow for the Procore application functions as expected.
Optional: Add any 'Standard Fields' to the form as desired.
Note
The options in the 'Standard Fields' area are developed and maintained by DocuSign®. To learn how to use DocuSign®, Procore recommends reviewing the content on support.docusign.com.
Optional: To preview the envelope as a recipient, click Preview. The click the close (x) icon in the top right corner to close the preview.
When you are ready send the envelope out for signature, click Send.
DocuSign® sends the envelope to the specified recipients. Recipients can then continue with the Next Step. After all signatures are collected and applied to the document in DocuSign®, you will need to manually change the status of the contract to 'Approved' in Procore.