Create and Apply a Fieldset
Things to consider
In this step, you are deciding what information (or data fields) will be associated with this Correspondence Type. The fields you add will dictate what information the project teams will collect “out in the wild” when they use this Correspondence Type on an actual project. For example, does this Correspondence Type need a due date, an attachment field, or a place to document cost impact?
You can mark fields as “required,” “optional,” or hide them altogether.
You can add custom fields, to further customize the Fieldset.
You can create multiple different Fieldsets for a given Correspondence Type, in order to accommodate variations on data needs for different project types.
Steps
After you have created the correspondence type, you can then finish creating the fieldset for the correspondence type.
Update the Fieldset Settings
Start at step 6 below:
Navigate to the Company level Admin tool.
Under 'Tool Settings', click the tool you want to create configurable fieldsets for.
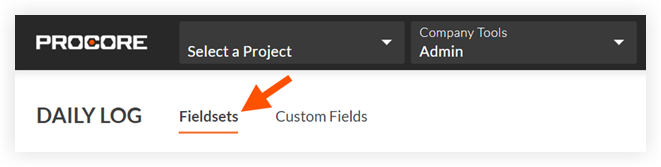
Click the Fieldsets tab.
Note: Tools without other settings in the Company level Admin tool will open to this page automatically.Click Create Fieldset and if required, select the fieldset type.
Enter a name for the fieldset, then click Create.
On the 'Edit Fieldset' page, each field name has the following options:
Click the toggle to the ON
 position to make the field visible in the section.
OR
Click the toggle to the OFF position to hide the field in the section.
Note: A icon indicates that the field is visible by default and cannot be changed to hidden.
Mark the 'Required' checkbox to designate the field as required.
OR
Clear the 'Required' checkbox to designate the field as optional.
Notes:* Fields without a checkbox are optional by default and cannot be changed to required.* A gray marked checkbox indicates that the field is required by default and cannot be changed to optional.
Optional: If available, click Create Section to create a new section. See Create Custom Sections.
Click Save.
In the 'Apply changes to [#] project(s)?' window, click Assign Projects to add the fieldset to projects.
In the 'Assign Projects' window, mark the checkbox next to each project you want to apply the fieldset to and click Update.
In the 'Apply changes to [#] project(s)?' window, click Confirm.
Optional: To set a fieldset as the default for new projects, click the
 icon at the end of its row on the 'Fieldsets' tab and select Set as New Project Default.
  Note
NoteProjects created from a project template that includes fieldsets will inherit the fieldsets from the project template instead of your company's default fieldsets. See Configure a Project Template.
Optional: Add a Custom Field to the Fieldset
Start at step 3 below:
Click the Fieldsets tab.
Click Edit next to the fieldset you want to add the custom fields to.
OR
Click Create New to create a new fieldset. See Create New Configurable Fieldsets.Optional: Add the field to a custom section**.** See Create Custom Sections and What are custom sections and which Procore tools support them?
Scroll toward the bottom of the page and click Add Custom Field.
Click Create New.
Complete the following information for the new field:
Field Name: Enter a name for the field.
Field Type: Select the type of field you want to create.
Note: Some field types may not be available for all tools.
For Multi Select and Single Select field types, complete the following steps to add options:
Click Add Options.
Enter the option in the field.
For each additional option needed, click Add Option and enter the option.
Click Save Options.
Click Done.
Click Create and the field will automatically be added to the bottom of the fieldset.
Click the toggle to the ON
position to make the custom field visible in the section, or click to the OFF position to hide the custom field.If the custom field should be required, mark the 'Required' checkbox. Otherwise, the field will be optional.
Click Save.
If the fieldset is already applied to one or more projects, click Apply to Existing.
OR
If you have just created a new fieldset, click Assign Projects and begin at step 3 of the Apply a Fieldset with Custom Fields to Projects section below.Optional: Click and drag on the reorder grip
 icon to rearrange the order that the custom fields will appear on a fieldset.
Note: Procore Standard fields cannot be reordered.
Optional: Add a Custom Section to the Fieldset to Organize Custom Fields
Start at step 5 below:
Navigate to the Company level Admin tool.
Under 'Tool Settings', click the tool you want to create a custom section for.
Click Fieldsets.
Click Edit next to the fieldset you want to add a custom section to.
OR
Click Create New to create a new fieldset. See Create New Configurable Fieldsets.Click +Add Section.
In the 'Add Section' window, enter a name for the section and click Add.
To add one or more custom fields to the new custom section, click Add Custom Field under the custom section's name.
Click Choose from Existing to add an existing custom field.
OR
Click Create New to create and add a new custom field. See Create Custom Fields Within a Fieldset.Repeat steps 5-8 to add more custom sections.
Optional: To rearrange custom sections, follow these steps:
Hover your cursor next to the custom section until the grip icon
displays.Click on the grip icon and drag the custom section above or below another custom section.
Optional: To move a custom field to a different custom section, follow these steps:
Hover your cursor next to the custom field until the grip icon
displays.Click on the grip icon and drag the custom field above the Add Custom Field button in the custom section you want to move it to.
Click Save.
Finish Creating Your Fieldset and Apply it to Projects
After you have added one or more custom fields to the fieldset, click Save.
In the 'Apply changes to [#] project(s)?' window:
 Important
The Correspondence tool will not display on a project until at least one correspondence type has been created and a fieldset for at least one correspondence type has been applied to the project.
Click Apply to Existing to save your changes to the fieldset on projects that the fieldset is already applied to.
ORClick Assign Projects to add or remove the fieldset from projects.* In the 'Assign Projects' window, mark the checkbox next to each project you want to apply the fieldset to and click Update.* In the 'Apply changes to [#] project(s)?' window, click Confirm.
Optional: To set a fieldset as the default for new projects, click the
icon at the end of its row on the 'Fieldsets' tab and select Set as New Project Default.